Главная страница Случайная страница
Разделы сайта
АвтомобилиАстрономияБиологияГеографияДом и садДругие языкиДругоеИнформатикаИсторияКультураЛитератураЛогикаМатематикаМедицинаМеталлургияМеханикаОбразованиеОхрана трудаПедагогикаПолитикаПравоПсихологияРелигияРиторикаСоциологияСпортСтроительствоТехнологияТуризмФизикаФилософияФинансыХимияЧерчениеЭкологияЭкономикаЭлектроника
Adjust Topology in 3D Studio Max
|
|

Next we go to the tool palette and we will find there our new model created from ZSpheres, so we click on it and it will replace the ZSpheres model by the new one. By default this new model has two levels of division so we will press Shift+d to go to the lowest level, and now we are ready to export our low res cage to 3D Studio Max® to refine it. To do so, we can just click on Tool: Export and choose where we will save the obj file.
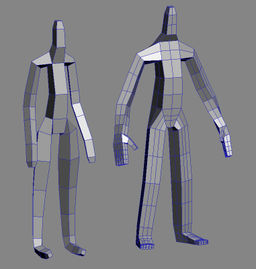
Then, import our obj mesh into 3dsmax and with its polygon tools we will edit the shape, add some loops and create the proper fingers/toes as shown in the image. Take your time in doing this and place carefully new loops where you think you may need them.

After this, we will export the mesh into a.obj file, using File-> Export Selected, and setting the dialog as shown in the image.
[edit]
|
|